
Before you start
Complete first launch
Choose the incident data location, create the local administrator and activate your license. Local AI is optional: you can skip it and complete the entire manual evidence-to-report workflow.
- Use a training incident until your team has agreed its evidence-handling rules.
- Know where the original evidence is stored and who collected it.
- Use an account whose role matches the task: Analyst, Reviewer or Approver.
Step 1
Create the incident
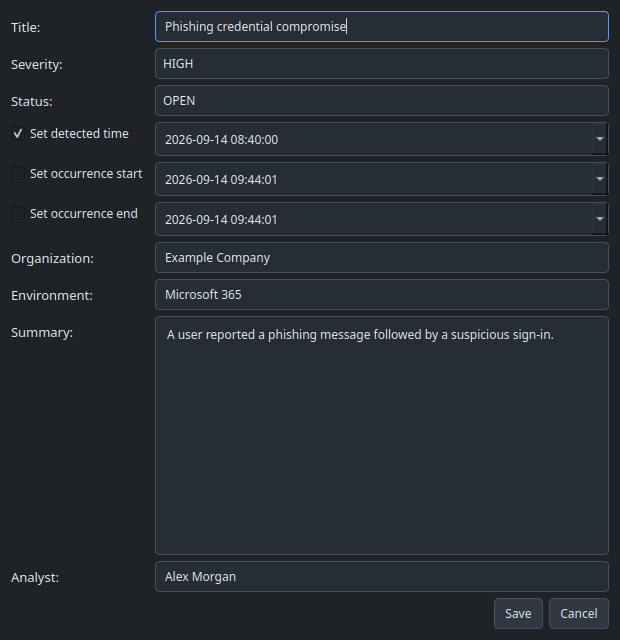
- Open Incidents and select Create Incident.
- Enter a short title that describes what happened, not an assumption about the cause.
- Choose the initial severity and status. Add the detected time, organization, environment and analyst when known.
- Write a brief factual summary, then select Create Incident.
Good title: “Phishing credential compromise.” Avoid: “User caused the breach.” Conclusions belong in findings after the evidence has been reviewed.
Step 2
Find and open the incident
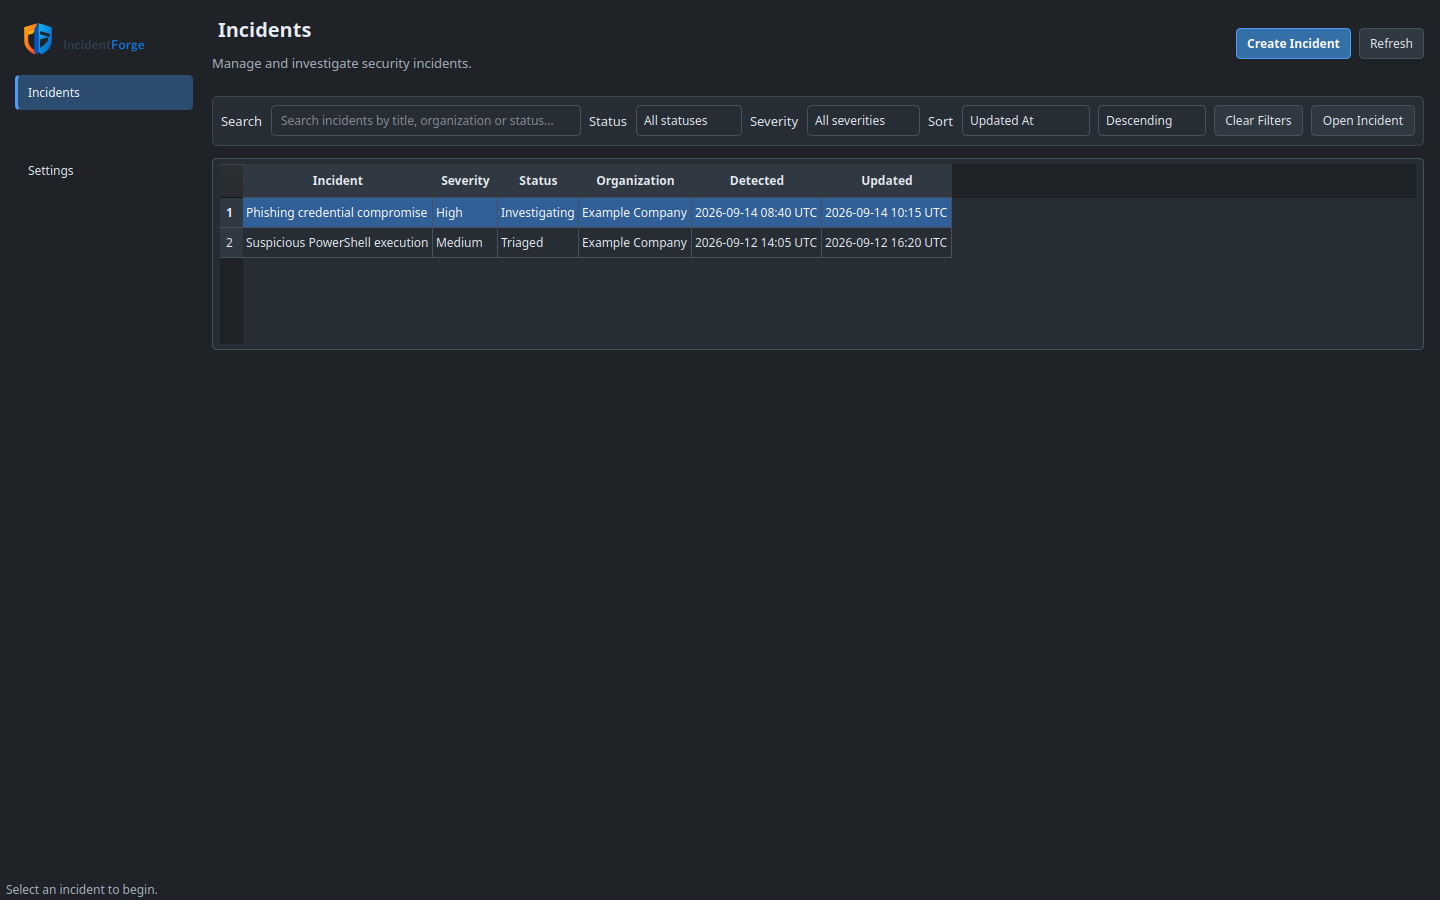
Use Search, Status and Severity when the list grows. Select the incident, then choose Open Incident. You can also open a selected row with Enter or by double-clicking it.
Step 3
Confirm the incident context
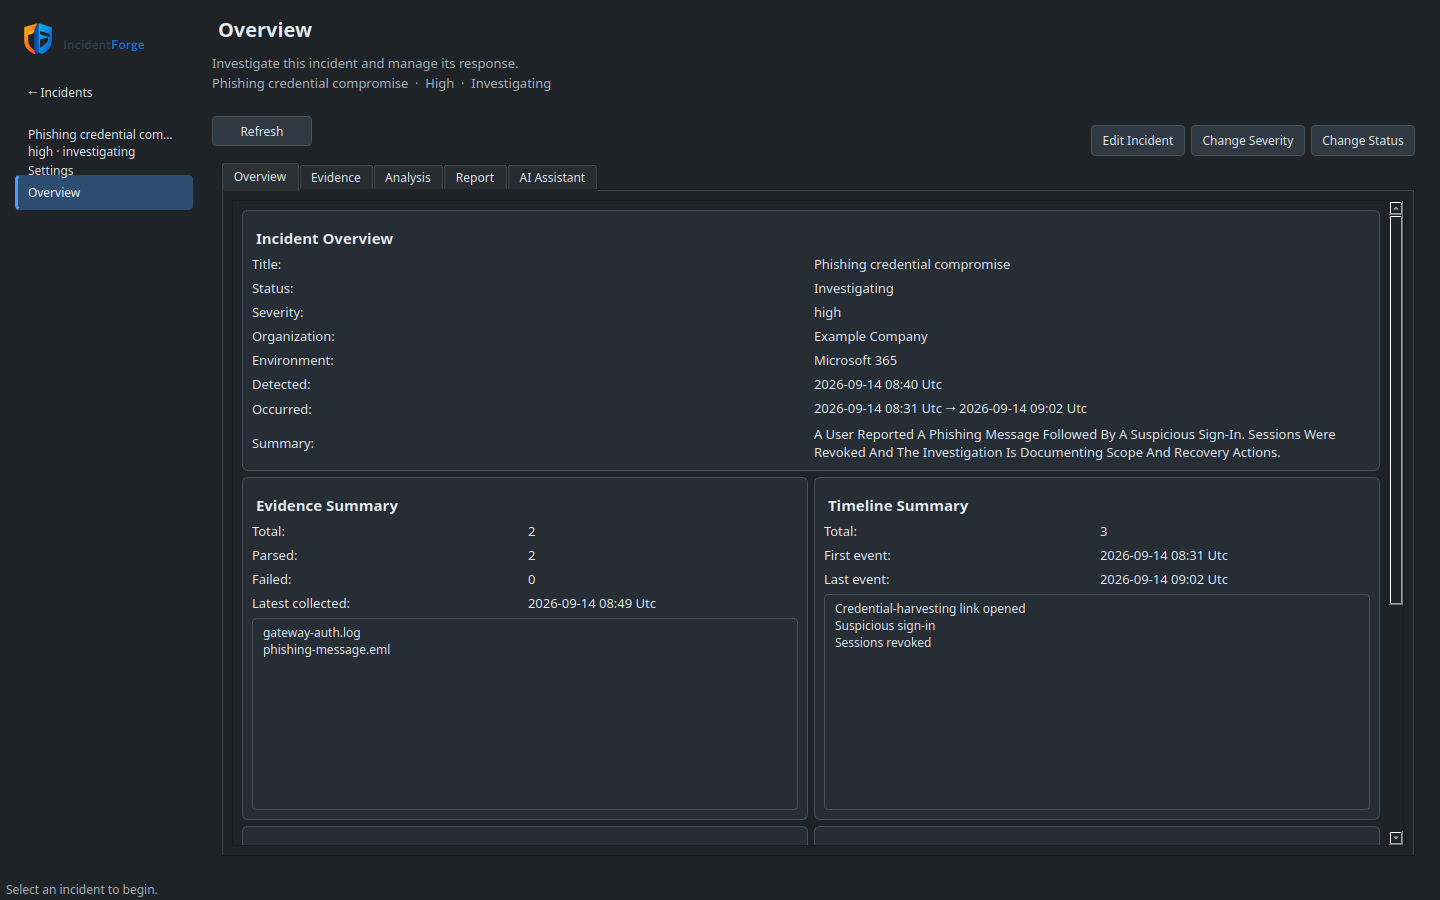
Read the Overview before adding analysis. Confirm the organization, environment, severity, status, detected time and summary. Use Edit Incident, Change Severity or Change Status when the record needs correction.
Move through the workflow tabs from left to right: Overview, Evidence, Analysis, Report and Audit. The counters show how much structured material the incident currently contains.
Step 4
Add and preserve evidence
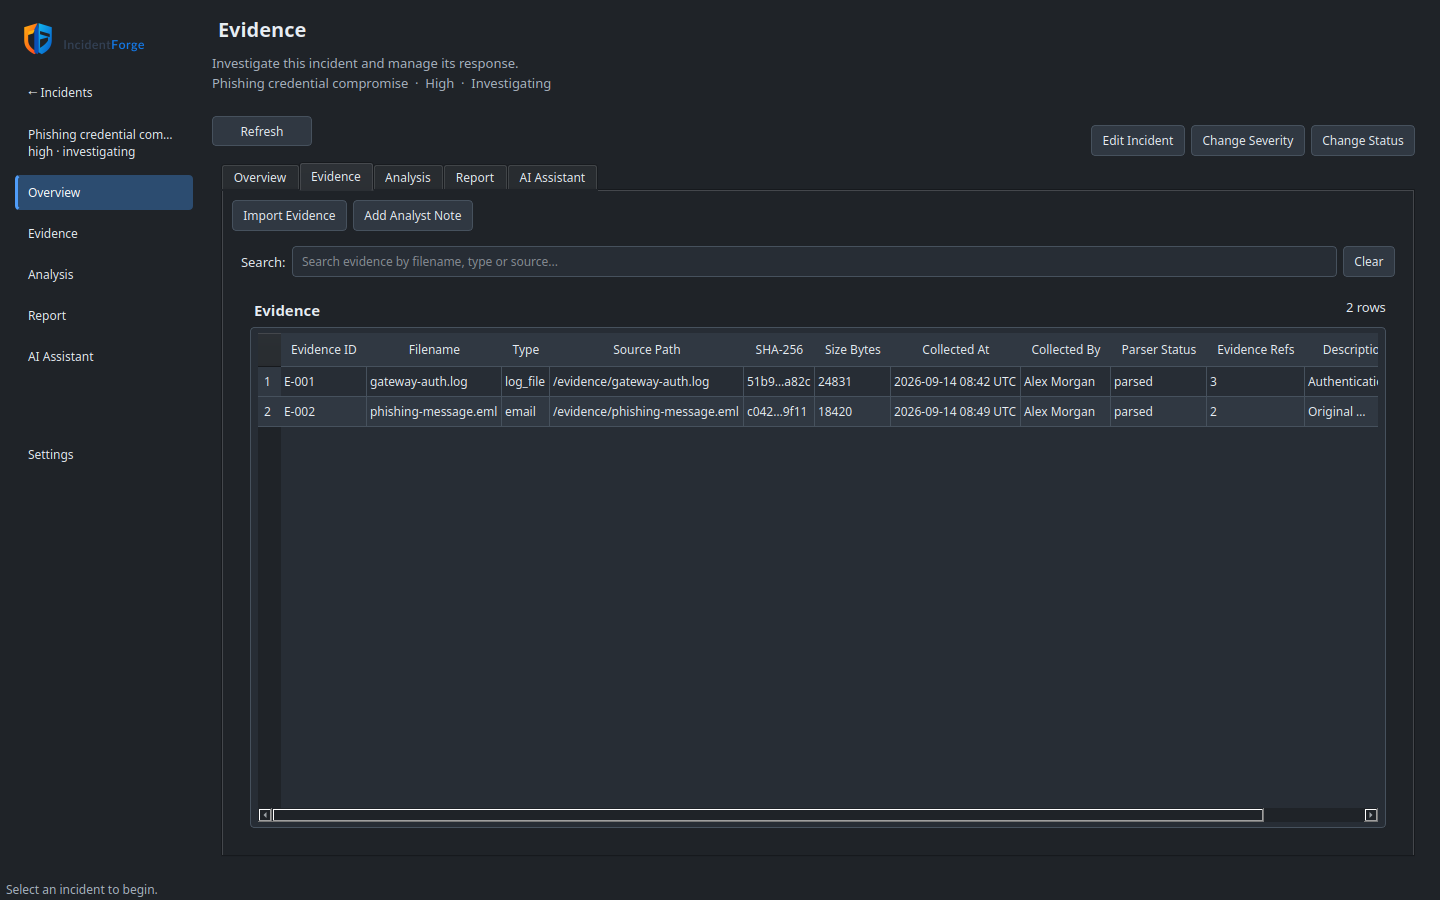
- Open Evidence and select Import Evidence for a supported file, or Add Analyst Note for an observation that is not a file.
- Record the source, collector and context accurately. Import a controlled copy where your procedure requires the original to remain untouched.
- Wait for the parser state. A failed parser does not make the source file disappear; investigate the failure before relying on extracted content.
- Open the evidence record and check its metadata and hash before linking it to a timeline event, IOC or finding.
Step 5
Build the investigation record
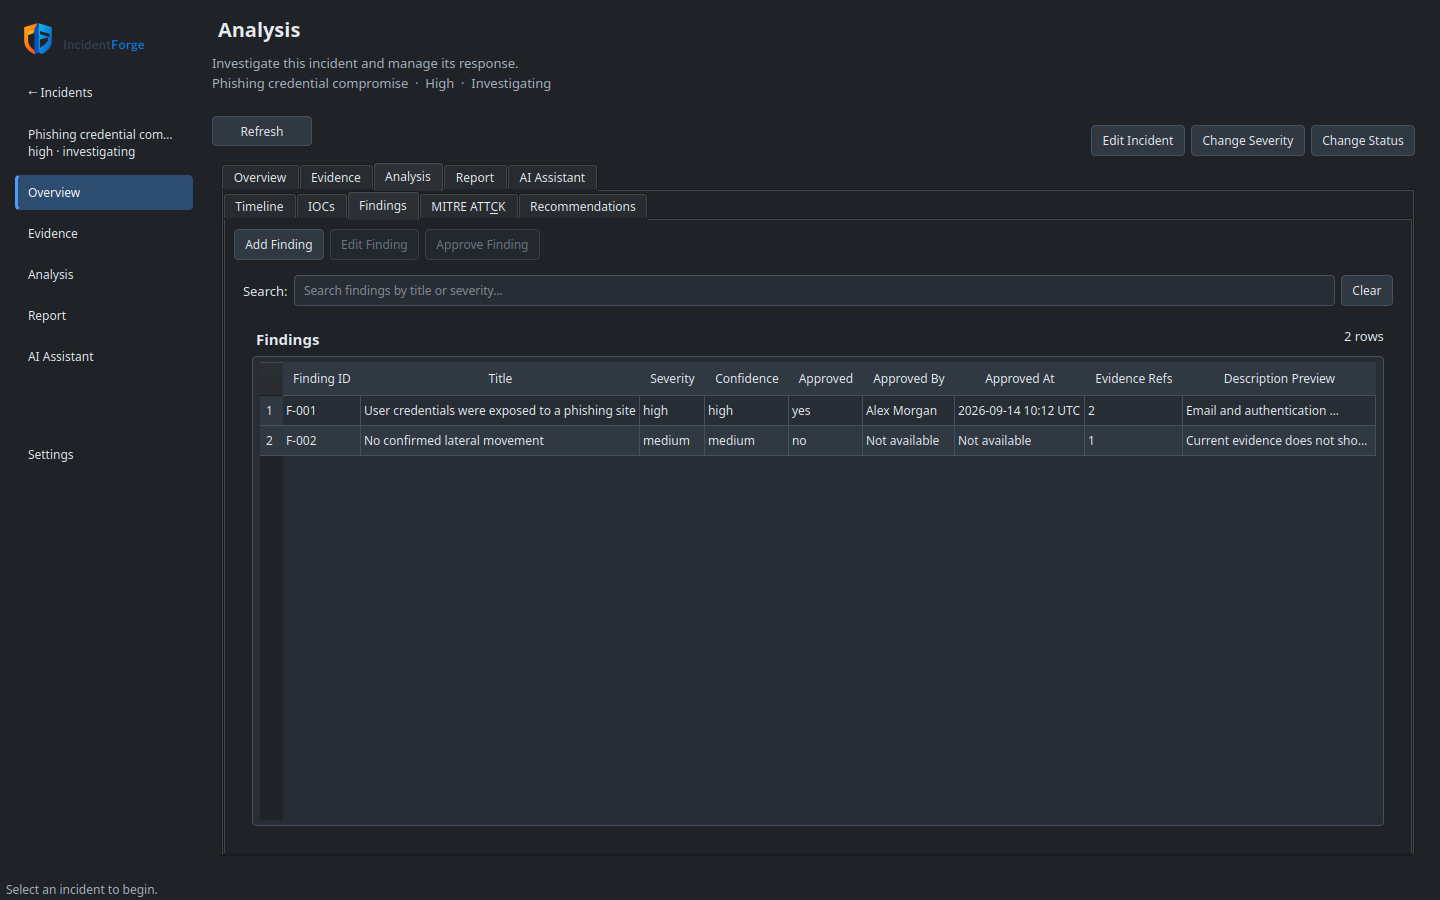
Analysis is not one large note. Add small, reviewable records and connect each conclusion to the evidence that supports it.
- Timeline
- Record what happened, when it happened and which evidence supports the event. Distinguish the observed time from the time the event was recorded.
- IOCs
- Add observable values such as a domain, IP address or file hash. Record confidence and status; an indicator is not automatically proof of compromise.
- Findings
- State what the evidence supports, explain the reasoning and link the relevant evidence. Keep unchecked assumptions out of approved findings.
- MITRE ATT&CK
- Map a technique only when the available behavior supports that mapping. The mapping helps communication; it does not replace the evidence.
- Recommendations
- Describe a concrete response or improvement, then assign an owner, priority and status so the action can be followed.
Step 6
Use AI drafts safely — or skip them
The AI Assistant can propose draft text from the local incident record when Local AI is configured. Open a proposal in its editor, compare it with the source evidence and save it only after a human review.
- Treat every AI response as an unverified draft, never as evidence.
- Reject invented facts, unsupported certainty and recommendations outside the incident context.
- If Local AI is unavailable, continue manually. It is not required to finish the incident or report.
Step 7
Review, approve and export the report
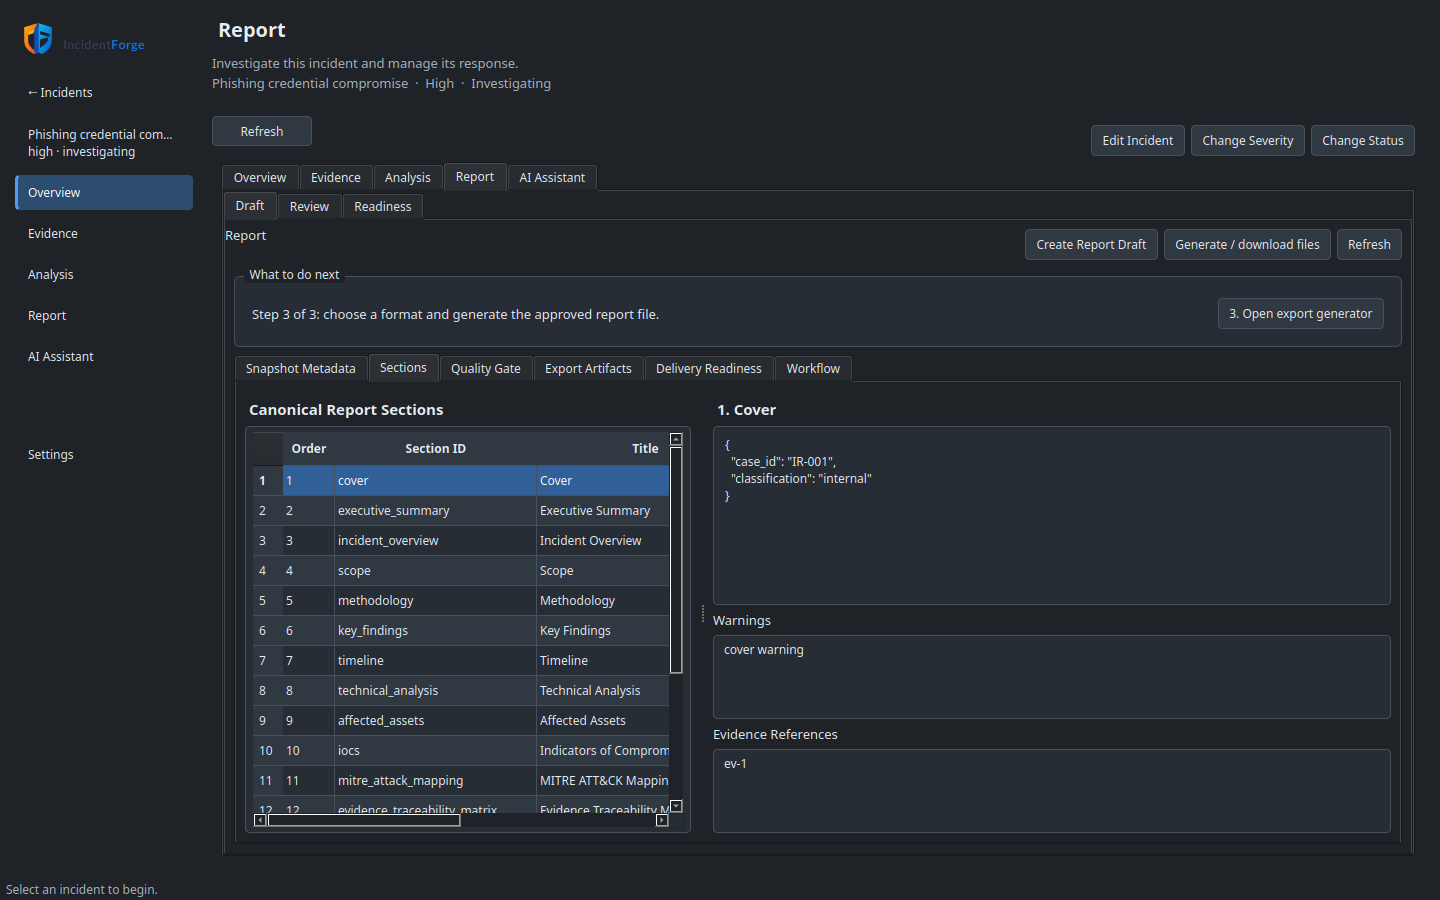
- Open Report, create or update the draft and review every section for accuracy and plain language.
- Use the workflow controls to submit the report for review. If sign-in is requested, go to Settings → Local Account, sign in and return to the report.
- Resolve readiness blockers. Accept a warning only when the team understands it and records a defensible reason.
- The Reviewer challenges the evidence and reasoning. The Approver confirms what becomes final.
- After approval, choose Generate / download files and select the required PDF, DOCX, HTML or JSON output.
Step 8
Close and retain the incident
Change the incident status only when response work and required review are complete. Store the approved export according to your organization’s retention policy. Archiving an IncidentForge record is an organizational action; it does not by itself authorize deletion of original evidence.
Your first incident is ready when:
- The basic incident context is accurate.
- Evidence sources and hashes are recorded.
- Timeline events, IOCs and findings are supported by evidence.
- Recommendations have clear owners and priorities.
- A human Reviewer and Approver completed their checks.
- The approved report was exported and retained correctly.